Product Photography for Wine & Spirits
Wine and spirits product photography sells a feeling of occasion and ritual before it sells a product. Buyers of a $60 bottle of whiskey or a premium natural wine are not making a purely rational decision — they're imagining themselves opening the bottle for a dinner party, giving it as a gift, or unwinding at the end of a long week. The photography's job is to trigger and reinforce that imagination.
The technical challenges of this category are significant: glass bottles refract light unpredictably, labels need to be readable while the bottle looks beautiful, and pour shots require precise timing and setup. But the craft challenges are equally important — communicating luxury, ritual, and occasion through light and composition requires intentional aesthetic decisions.
6 tips for wine & spirits product photography
Backlight glass bottles to make them glow
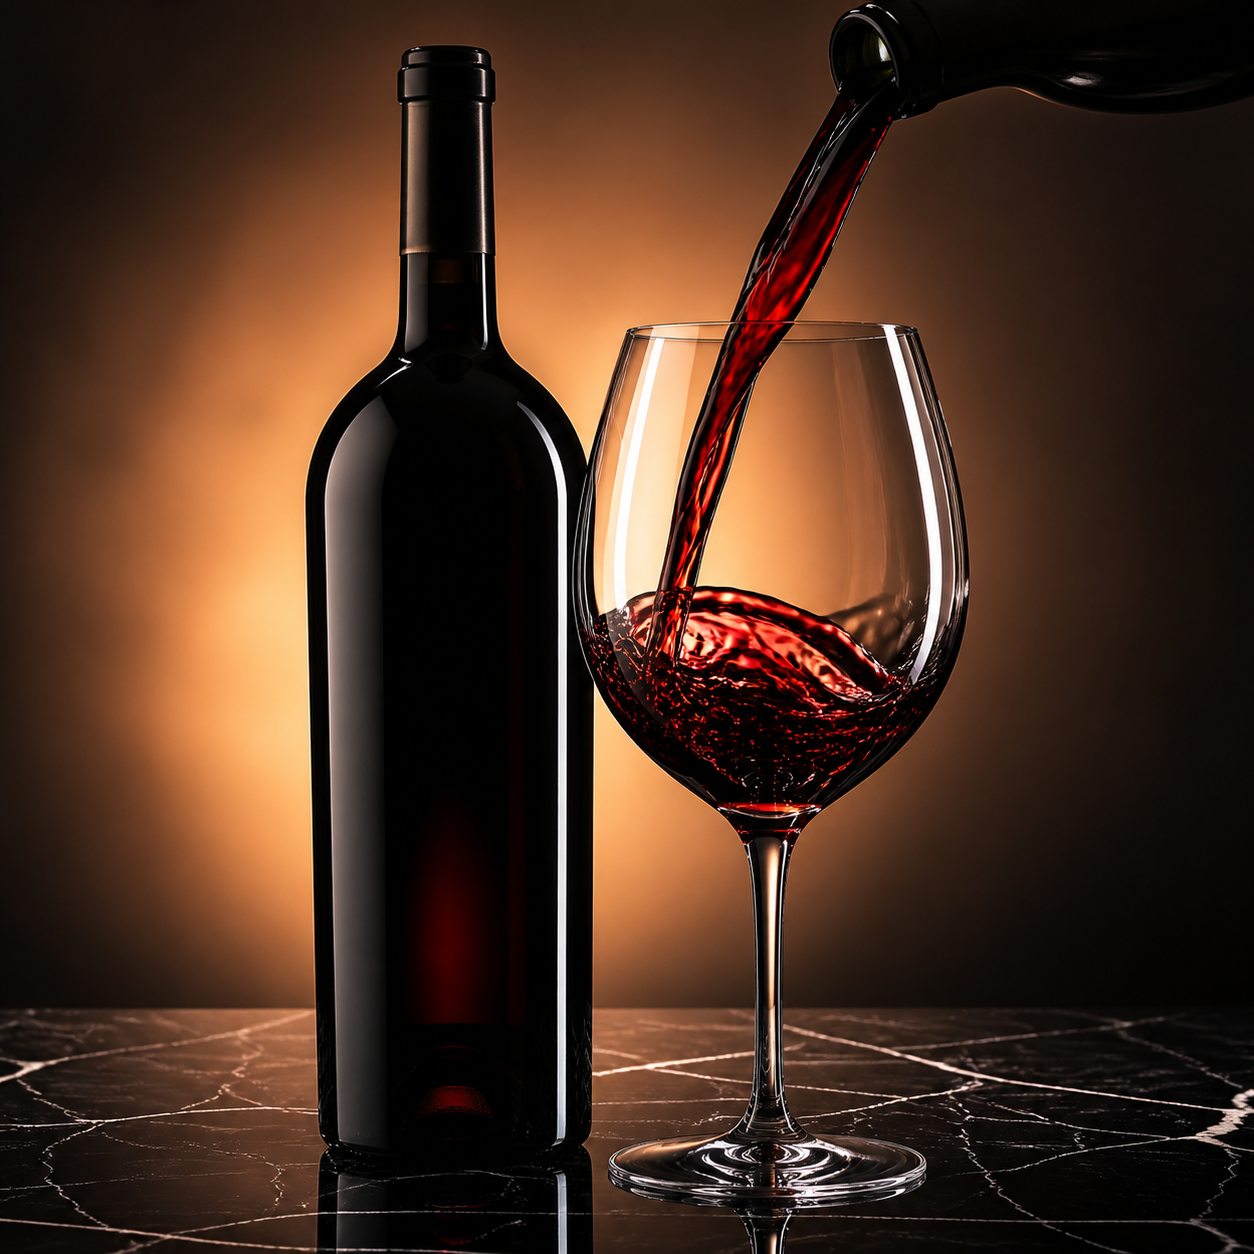
Place a light source directly behind the bottle. Light passes through the glass and illuminates the liquid from within, making white wine look like liquid gold, red wine look like deep ruby, and spirits glow with their characteristic color. Add soft front fill so the label doesn't disappear into shadow. This backlighting technique is responsible for most of the world's great bottle photography.
Dark, reflective surfaces add luxury and depth
Dark marble, polished slate, lacquered black surfaces, and dark wood all create reflections and depth that luxury bottle photography requires. The reflection of the bottle in a dark surface doubles the sense of presence. These surfaces also provide the contrast that makes light-colored spirits and wines look premium and desirable.
Show the ritual: a glass, a pour, a serve
A bottle beside a glass, a pour in motion, a bottle being held over an ice-filled rocks glass — these elements transform a product shot into a scene and trigger the buyer's imagination about the occasion. The most effective bottle photography has at least one image that communicates not just what the product is, but when and how it will be enjoyed.
Keep labels fully visible and readable
The label is the bottle's identity — the name, the producer, the vintage, the origin. A hero shot where the label is partially obscured or angled away fails the primary information task. Position the bottle to show the full front label clearly, with the lighting arranged so no part of the label falls into shadow.
A pour shot requires a dedicated setup
Pour shots — liquid leaving a bottle in a controlled stream — require a second person, a very fast shutter speed (1/500 or faster), burst mode, and many attempts. The lighting must be set up before the pour and remain consistent through multiple takes. Budget an entire session for a pour shot if you want one — it's a complex, rewarding image.
Condensation on a cold bottle adds appetite appeal
A chilled white wine or spirit bottle with condensation droplets communicates freshness, temperature, and readiness to drink. This detail significantly increases the appetite and occasion appeal of beverage photography. Refrigerate the bottle before shooting, work quickly, and photograph the condensation before it evaporates or runs.
Equipment and setup for wine & spirits photography
Camera: 50-85mm prime. Lighting: one backlight (LED behind the bottle) plus one soft front fill (small softbox from the front). A narrow strip LED behind the bottle is ideal for precise backlighting. Backgrounds: dark marble slab, polished dark slate, lacquered black board. Glassware: clean, fingerprint-free wine glasses or tumblers.
Common mistakes to avoid
- Label obscured or in shadow — the label is the product's identity and must be fully visible in the primary shot. This is non-negotiable.
- Single-source hard light on glass — creates unpredictable, harsh reflections. Use backlight plus soft front fill for controlled, beautiful glass photography.
- No pour or usage shot — product-only bottle shots miss the occasion and ritual that drive premium beverage purchases.
Styles that work for wine & spirits
In noprompt.design, start with: Neon Dark, Marble Luxury, Warm Minimalist. Each style is pre-tuned for this product category — no settings to adjust.
Try it free — upload your wine & spirits product now
Frequently asked questions
What's the best lighting for wine bottle photography?
Backlight as the primary technique — a light source directly behind the bottle illuminates the liquid from within, creating a glow that no other technique replicates. Add a soft fill from the front to keep the label readable. A second light slightly to one side adds depth to the bottle's body. This three-point approach covers most wine and spirits photography effectively.
How do I keep glass reflections from ruining the shot?
Control the environment: dark walls, dark surfaces, and a limited number of light sources reduce uncontrolled reflections. Use the bottle's position relative to the camera to place lights where their reflections fall on non-label areas of the glass. A polarizing filter on the lens reduces surface reflections from all glass surfaces simultaneously.
How do I photograph a pour shot?
Setup first: lock your camera on a tripod, set a fast shutter speed (1/500 minimum), test the lighting with the empty glass in position. Have a second person hold the bottle and pour on your cue while you shoot in burst mode. Plan for many attempts — most pour shots require 20 to 50 exposures to get one that works perfectly.
What surfaces work for premium spirits and wine?
Dark marble with a natural vein pattern gives a gallery-and-restaurant feel. Polished dark slate gives a sophisticated, editorial feel. Warm dark wood gives a bar and whisky-room feel. Choose based on the spirit's character: whisky suits wood, gin suits marble, wine suits dark stone. Light or warm-neutral surfaces don't provide the contrast that makes dark glass bottles look premium.
Can I take professional alcohol product photos without a camera?
Yes — the two things that sell a bottle are the label and the liquid's glow, and both are achievable with a modern phone. Shoot next to a large window with the bottle between you and the light so the liquid glows from within, set the bottle on a dark matte surface (black acrylic, slate, or dark wood) so reflections stay controlled, and bounce light back into the label with a piece of white card just out of frame. For consistent studio-lit results across a whole catalog — clean backgrounds, readable labels, controlled reflections on every bottle — AI product photography tools like noprompt.design turn an ordinary phone photo of a bottle into a professional product image without writing a single prompt.
How do I photograph wine and spirits for an online store?
Online buyers can't taste the bottle or hold it, so the photography must deliver the three things they decide on: the label, the color of the liquid, and the occasion. Lead with a hero shot of the full bottle with the front label perfectly readable on a dark luxury surface, add a backlit image that shows the liquid's true color glowing through the glass, and include one lifestyle shot — a pour into a glass or the bottle at a set table — that makes the occasion tangible. Shoot the whole catalog on the same background so the store reads as one brand, and make sure the label text is sharp: buyers will zoom in to check the vintage and ABV before purchasing.
How do I edit alcohol product photos to look professional?
Edit for accuracy before style. Correct perspective so the bottle reads as perfectly vertical and the label is rectangular, set white balance so the liquid's color is true — pale straw for white wine, deep ruby for red, amber for whiskey — and remove dust, smudges and fingerprints from the glass, since buyers read them as product defects. Deepen the dark background and lift the backlit glow gently to add contrast, but never shift the label's colors: for wine and spirits, trust in the label and the liquid's true color is what closes the sale.
How do I photograph whiskey, gin and clear spirits without them looking flat?
Clear spirits are the hardest bottles to photograph because the liquid has almost no color to catch light — the bottle depends on light, not tint, to look like a premium product. Backlight the bottle so the liquid glows and refracts, then add a subtle colored gel or a warm card behind the bottle for gin and vodka so the liquid picks up a believable tone instead of reading as plain water. Keep the background dark so any internal glow carries, and shoot the label dead-on: for clear spirits the label is doing the entire branding job, so light it separately and evenly and make sure the text is pin-sharp. Avoid front-on flash, which flattens the glass and turns clear liquid into a grey shape.
How do I photograph a bottle on a white background for Amazon or eBay?
Marketplaces want the bottle cut out on pure white, which is the opposite of the dark, luxurious look most spirits brands prefer. Do both: shoot a clean white-background hero that satisfies the listing requirement — a light tent or two white panels behind and beside the bottle, a front fill to keep the label readable, and enough backlight through the glass that the liquid still shows its true color — then use the dark, styled shots everywhere else. Slight under-exposure of the background plus editing to pure #FFFFFF satisfies Amazon's main-image rule, and a consistent white-background pass across the whole catalog keeps your listings looking like one brand instead of a set of mismatched photos.
How do I stop a dark bottle from disappearing into a dark background?
Dark-on-dark is the most common way a premium bottle shot goes wrong: a deep green or brown glass bottle placed on a black or charcoal surface loses its silhouette and reads as a shapeless dark mass. The fix is separation, not more light on the front of the bottle. Place a narrow strip light or a small softbox behind and slightly to one side of the bottle so a thin rim of light traces the bottle's contour and separates it from the background, and keep a lighter grey or muted textured surface just behind the bottle so the silhouette always has something to read against. Then let the front stay dim: for dark spirits you want the edges bright and the label lit, with the body of the bottle almost in shadow — that contrast is what makes the glass look expensive rather than invisible. Check the result at thumbnail size, because that is where buyers decide whether to open the listing.
How do I photograph a gift set or several bottles together?
Multi-bottle shots — gift sets, mixed cases, wine-club shipments, bundles — sell the occasion and raise average order value, but they multiply every reflection problem. Build the group shot in a V or gentle arc rather than a flat row: stagger the bottles by height so no label is hidden, and angle each one a few degrees so their front labels stay readable while the group reads as a single composition. Light the group with one broad backlight behind the arrangement (so the liquid in every bottle glows) plus two soft fills angled in from the front corners — not a single centered front light, which will flatten the bottles and pick up a hot reflection in the middle one. Shoot on one consistent background for the whole catalog so gift sets and single bottles sit side by side as one brand. If the set is sold as a package, also include one clean overhead flat-lay of the bottles plus any packaging so buyers can see exactly what arrives.
Related deep-dive: How to photograph glass bottles without glare.