Product Photography for Fashion & Apparel
Fashion product photography has two jobs in constant tension: it needs to show the product accurately enough that buyers don't return it, and aspirationally enough that buyers want it. Too clinical and it looks like a catalog nobody engages with. Too styled and buyers feel deceived when the product arrives.
The category covers a huge range — sneakers shoot differently from tailored clothing, which shoots differently from handbags and accessories. The common thread is that fashion is about silhouette, fabric quality, and how the product will feel to wear or carry. Good fashion photography answers those questions visually before the buyer reads a single word of the product description.
6 tips for fashion & apparel product photography
Match production level to price point
A $30 basic tee shoots well on a clean white background with consistent lighting. A $300 designer piece needs atmosphere — soft side light, a styled environment, a model or ghost mannequin that gives the fabric shape and movement. The production level signals the product's value tier before the price is even visible.
Use side light to reveal fabric texture
Flat front lighting hides fabric quality — it flattens texture and makes everything look two-dimensional. Side light or a 45-degree key light rakes across fabric, revealing the weave, nap, and material quality. This matters most for premium fabrics: wool, denim, leather, and technical synthetics all have texture stories that only directional light can tell.
Ghost mannequin beats flat-lay for structured apparel
A ghost-mannequin shot — where the mannequin is removed in post, leaving the garment with shape and body — shows how the piece fits and falls far better than a flat lay. Flat lay works for accessories and casual basics. For jackets, shirts, dresses, and trousers, the mannequin treatment significantly outperforms flat lay for conversion.
Floating sneaker shots are the footwear standard
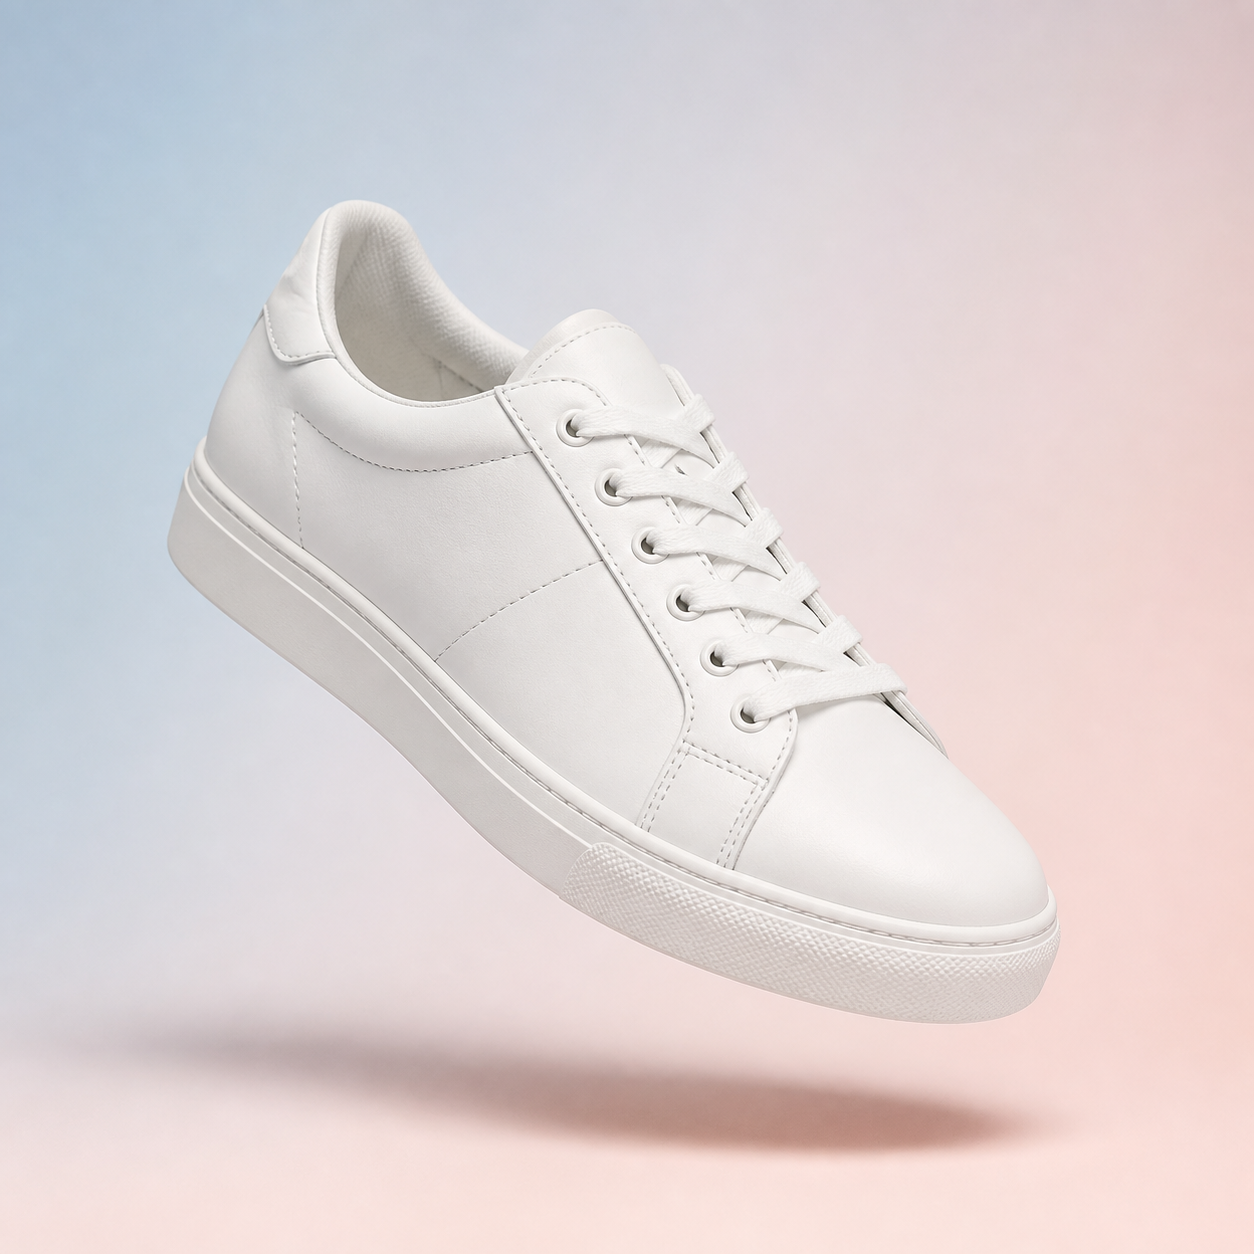
Shoe photography has an established format: the shoe floats against a clean background at a 45-degree three-quarter angle, with a subtle shadow below. This angle shows the sole profile, upper shape, and design details simultaneously. Straight-on and top-down shots are secondary — the three-quarter float is the hero image footwear buyers expect.
Consistency across the catalog matters as much as individual quality
A catalog where every product is photographed at the same angle, same background, same lighting conditions reads as professional. A catalog of technically impressive but inconsistent images reads as disorganized. If possible, shoot all products in a catalog in one session to maintain perfect consistency.
Show fabric movement when relevant
For dresses, scarves, wide-leg trousers, and anything designed to drape or flow, a static flat shot misrepresents the product. A shot with natural movement — a slight air-blown lift, or a walking model — shows the buyer how the fabric behaves. This is especially critical for silk, chiffon, and loose-knit products.
Equipment and setup for fashion & apparel photography
Camera: 50-85mm lens for flattering perspective on apparel — avoid wide angles that distort proportions. Lighting: main softbox from the side or 45 degrees plus a fill card opposite. A background sweep (white, grey, or colored paper) gives a clean consistent surface. For footwear: a small turntable and a second light for the sole.
Common mistakes to avoid
- Flat front lighting — it hides the fabric quality that justifies the price. Side light is almost always better for clothing with any texture or structure.
- Inconsistent backgrounds across a catalog — mixing white, lifestyle, and studio shots in one listing confuses buyers about what they're actually purchasing.
- Not steaming or ironing garments — wrinkles in a product shot read as poor quality. Steam every piece before shooting. It's the highest-ROI minute in the entire process.
Styles that work for fashion & apparel
In noprompt.design, start with: Warm Minimalist, Natural Light Window, Lifestyle Flatlay. Each style is pre-tuned for this product category — no settings to adjust.
Try it free — upload your fashion & apparel product now
Frequently asked questions
Flat-lay or ghost mannequin for clothing?
Ghost mannequin for structured pieces — jackets, shirts, dresses, trousers — because it shows fit and shape that buyers need to evaluate. Flat-lay for accessories, casual basics, and products where the overhead angle tells the complete story. If you can only do one for structured clothing, ghost mannequin consistently converts better than flat lay.
What's the best angle for sneakers?
Three-quarter angle at about 45 degrees, slightly elevated, with the toe pointing slightly toward the camera. This shows the toe box shape, sidewall profile, lacing system, and midsole simultaneously. Add a side-profile shot for sole and silhouette detail, and a close-up of any signature design element that differentiates the shoe.
Should I use models for apparel photography?
Models significantly lift conversion for apparel — buyers want to see how the piece fits on a body. If your budget doesn't allow models, ghost mannequin is the best alternative. Flat lay is last resort for clothing. For accessories like bags, belts, and wallets, model shots are helpful but not as critical as they are for wearable garments.
How do I keep product color accurate in photos?
Shoot in consistent daylight-balanced light (5500K), set a custom white balance, and shoot RAW. Post-process with a color reference card in the first frame of each setup. Never adjust colors by eye on an uncalibrated screen — what looks accurate to you will appear wrong on half your buyers' monitors.
Can I take professional fashion product photos without a camera?
Yes — a modern phone can deliver the two shots that sell fashion: a crisp ghost-style garment shot and a clean three-quarter sneaker float. Hang the garment on a plain hanger against a smooth wall or door, shoot at chest height so vertical seams stay straight, and place a large window at a 45-degree angle to the piece so the light rakes across the fabric and reveals its texture. Steam or iron every wrinkle first — wrinkles are the fastest way to read as low quality. For catalog-scale results without building a studio, AI product photography tools like noprompt.design turn an ordinary phone photo into a professional fashion product image with a clean background and accurate fabric color — no prompt writing required.
How do I photograph fashion products for an online store?
Online buyers decide from photos whether the fabric, fit and color match them, so your listing set needs three shots: a hero that shows the full silhouette (ghost mannequin for structured apparel, a floating three-quarter angle for sneakers, an interior shot for bags and accessories), a detail close-up that shows fabric texture under side light, and a back or alternate-angle shot that removes fit doubt. Photograph the entire catalog on the same background and lighting so the store reads as one brand, and be ruthless about color accuracy — color mismatch is the single biggest cause of apparel returns on Etsy, Shopify and Depop.
How do I edit fashion product photos to look professional?
Edit to protect the two things fashion buyers trust: the true silhouette and the true color. First correct geometry — verticals must be straight, so garments don't lean or look distorted. Then clean the surface: remove wrinkles, lint, dust and stray threads with retouching tools, but leave fabric texture intact — over-smoothing makes clothing look like plastic. Set white balance against a reference so fabric colors match reality, because buyers compare the photo to the item in their hands. Finish by removing background clutter and keeping the same clean backdrop across the catalog so every product looks like it belongs to one professional brand.
How do I photograph black or dark clothing without losing detail?
Dark garments swallow light, so the trick is to light the edges rather than the surface. Place one light behind and slightly to the side of the piece so it grazes the fabric and separates black-on-black seams, then add a soft fill only bright enough to open the shadows — never a flat frontal burst, which turns black fabric into a shapeless dark mass. Keep a white or mid-grey background so the silhouette has an edge to read against, expose for the highlights instead of the average, and shoot RAW so shadow detail can be lifted in editing. Slightly underexposed with visible texture always beats a washed-out, detail-free image.
What background should I use for clothing and apparel photos?
Use a pure white or seamless light-grey background for catalog and marketplace listings, because neutral backdrops keep every SKU visually consistent and satisfy the white-background main-image rules on Amazon, Etsy and most resale platforms. Switch to a warm textured surface — washed wood, linen or stone — when you want an editorial, brand-building look for hero and social images, and match the palette to your price tier: clean neutral for basics, richer muted tones for premium pieces. Whatever you choose, keep the same backdrop across the whole catalog so the store reads as one professional brand rather than a set of unrelated photos.
Related deep-dive: How to take product photos for Etsy — the listing shots that handmade and apparel sellers actually need.
Related guides: Bags & Leather Product Photography — handbags and leather goods run into exactly the same lighting problems as apparel. Eyewear Product Photography — sunglasses and frames are fashion accessories and sell on the same angles.