Product Photography for Tech & Gadgets
Tech product photography has one primary goal: make the device look as good in a photo as it feels in hand. Electronics have complex surfaces — glass screens, anodized aluminum, plastic ranging from premium matte to cheap-looking gloss — and they need to communicate precision and build quality without the buyer ever touching the product.
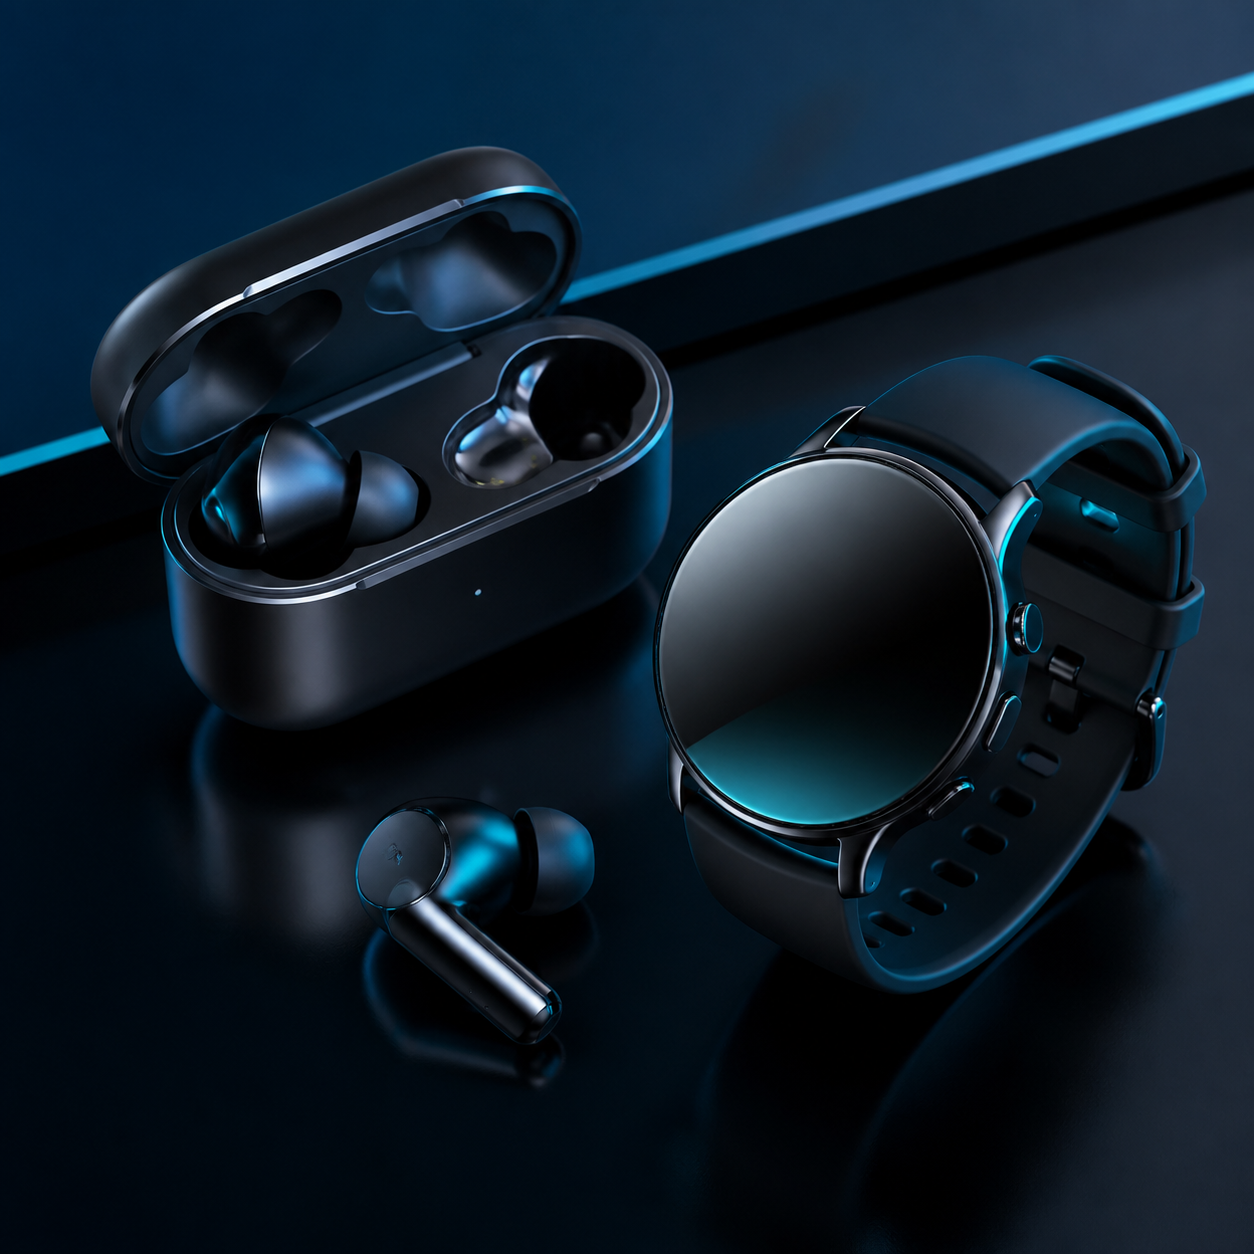
The category standard is dark backgrounds with rim lighting, borrowed from automotive and watch photography. Dark backgrounds remove everything that competes with the product. Rim lighting traces the device's edges and communicates machined precision. A slight angle adds depth that flat straight-on shots completely lack. The result looks like an Apple product page — which is exactly what electronics buyers expect.
6 tips for tech & gadgets product photography
Use dark gradient backgrounds for premium positioning
Dark gradient backgrounds — deep charcoal fading to black, or navy to near-black — eliminate visual competition and make any lit surface on the product stand out dramatically. They also communicate that this is a premium product before a single specification is read. Every major consumer electronics brand uses this approach for a reason.
Add rim lighting to trace edges
A single thin strip LED behind and slightly to the side of the product creates a rim light that traces the device's edges precisely. This edge definition reveals manufacturing quality — sharp, clean edges read as premium engineering; soft, undefined edges read as cheap plastic. Rim light is the signature technique for high-end electronics photography.
Shoot at a three-quarter angle
Straight-on flat shots of electronics look like instruction manuals. A 30-45 degree rotation, shot slightly above or at product level, adds three-dimensional depth that makes the product look real and tangible rather than rendered or documented. This angle also reveals thickness, port placement, and the product's actual proportions clearly.
Show the product in context of use
A cable plugged in, a screen lit with relevant UI, earbuds beside a phone — context shots answer the practical questions buyers actually have. What ports does it have? How large is the screen relative to a hand? What does the UI look like? These shots reduce buyer hesitation significantly compared to isolated product-only shots.
Handle matte and gloss surfaces differently
Matte surfaces (most modern anodized aluminum, matte plastic) absorb light and look good under most conditions. Gloss surfaces (glass screens, polished bezels) reflect everything. For gloss areas, use large, soft light sources placed carefully to create one intentional highlight rather than multiple chaotic reflections across the surface.
Show scale against something familiar
USB-C adapters, earbuds, and small gadgets are impossible to size from a product shot alone. Include a hand, a phone, or a familiar everyday object for at least one shot in the set. Size ambiguity increases cart abandonment for small electronics more than almost any other product category issue.
Equipment and setup for tech & gadgets photography
Camera: mirrorless with a 50-85mm prime for clean perspective without distortion. Lighting: one key light from the side or above plus a strip LED for rim light — a second LED panel can serve as fill. Backgrounds: dark grey or black fabric, or a printed dark gradient. A rotating product turntable helps maintain consistent angles across a product line.
Common mistakes to avoid
- Shooting screens with glare — glare on a product screen is a listing-killer. Position the key light so its reflection falls outside the screen area, or use a circular polarizing filter on the lens.
- Flat front-facing shots — they make every device look like a commodity. Even a 15-degree rotation adds significant depth that straight-on shots completely lack.
- Missing connector and cable shots — for accessories and peripherals, the connector quality is often the buyer's main concern. One close-up of the connector builds trust that a wide product shot never can.
Styles that work for tech & gadgets
In noprompt.design, start with: Gradient Tech, Neon Dark, Clean White Studio. Each style is pre-tuned for this product category — no settings to adjust.
Try it free — upload your tech & gadgets product now
Frequently asked questions
What background makes electronics look premium?
Dark gradient backgrounds — deep charcoal to black, or dark navy to black. They're used by Apple, Sony, and every premium electronics brand because they eliminate competition, make any lit surface pop, and signal quality before the buyer reads a single spec. White backgrounds work but read as catalog rather than premium positioning.
How do I photograph a screen without glare?
Angle the camera so the key light's reflection falls outside the screen area — usually by shooting from slightly above and tilting the product forward slightly. A circular polarizing filter on the lens cuts surface reflections from glass screens. Careful light positioning is more effective than the filter alone.
Should I use a product turntable for electronics?
For a product line with multiple SKUs or colors, yes. A turntable lets you set up the light once and rotate through consistent angles across every product. The result is a catalog that looks professionally coordinated. For a single product, manual repositioning works fine and doesn't require additional equipment.
How many angles do I need for a gadget listing?
Minimum five: hero three-quarter angle, flat front, back, side profile, and one in-use or scale shot. Add a connector or port close-up for any device with connectivity features. For hero product pages, 8-12 angles is typical for electronics. More images consistently correlates with higher conversion on product detail pages.